This is the creamed corn I make when dinner is almost done and I suddenly realize the plate needs one more cozy side. It is warm, buttery, a little sweet, and creamy without being fussy. Best of all, it comes together in one cast iron skillet with the kind of ingredients I usually have hanging around: corn, butter, milk, cream, a little onion, garlic, and seasoning.
At Cast Iron Weeknight Kitchen, I love a side dish that earns its spot without taking over the stove. This skillet creamed corn does exactly that. The corn gets a few minutes in hot butter so it can lose extra moisture and pick up a tiny bit of golden, toasty flavor before the quick cream sauce comes together. It tastes like something you planned, even when you absolutely did not.
Serve it with pork chops, roast chicken, meatloaf, ham, turkey, skillet steak, grilled sausages, or a simple weeknight sandwich situation that needs a warm side. It is also right at home on a holiday table because it does not need oven space, does not require fresh corn, and can be made in about 20 minutes.
Why You'll Love This Skillet Creamed Corn
- It is fast enough for a weeknight: From opening the corn to spooning it into a serving bowl, this side dish takes about 20 minutes.
- Canned, frozen, or fresh corn all work: Use what you have. Canned corn is the quickest, frozen corn is easy, and fresh corn is wonderful in summer.
- The cast iron adds flavor: A hot skillet helps the corn cook off moisture and catch a few buttery browned edges before the sauce thickens.
- No canned soup needed: Butter, flour, milk, and cream make a simple sauce that coats the kernels beautifully.
- It is holiday-friendly: This creamed corn fits next to turkey, ham, mashed potatoes, green beans, and rolls without adding stress.
- Easy to customize: Add Parmesan, cheddar, cayenne, smoked paprika, green onions, or extra black pepper depending on what else you are serving.
What Makes Cast Iron Creamed Corn So Good?
Creamed corn can go wrong when it turns soupy or bland. The trick is to let the corn spend a few minutes in the skillet before adding all the liquid. Corn, especially canned or frozen corn, brings moisture with it. A well-heated cast iron skillet helps that moisture steam off so the final dish tastes creamy instead of watery.
The sauce is built right in the pan. Butter gives richness, onion adds a savory base, and garlic brings just enough warmth. A small spoonful of flour thickens the milk and cream so the sauce clings to the kernels. A pinch of sugar is optional but helpful, especially if your corn is not super sweet. It does not make the dish taste like dessert; it just rounds out the flavor.
Ingredients You'll Need
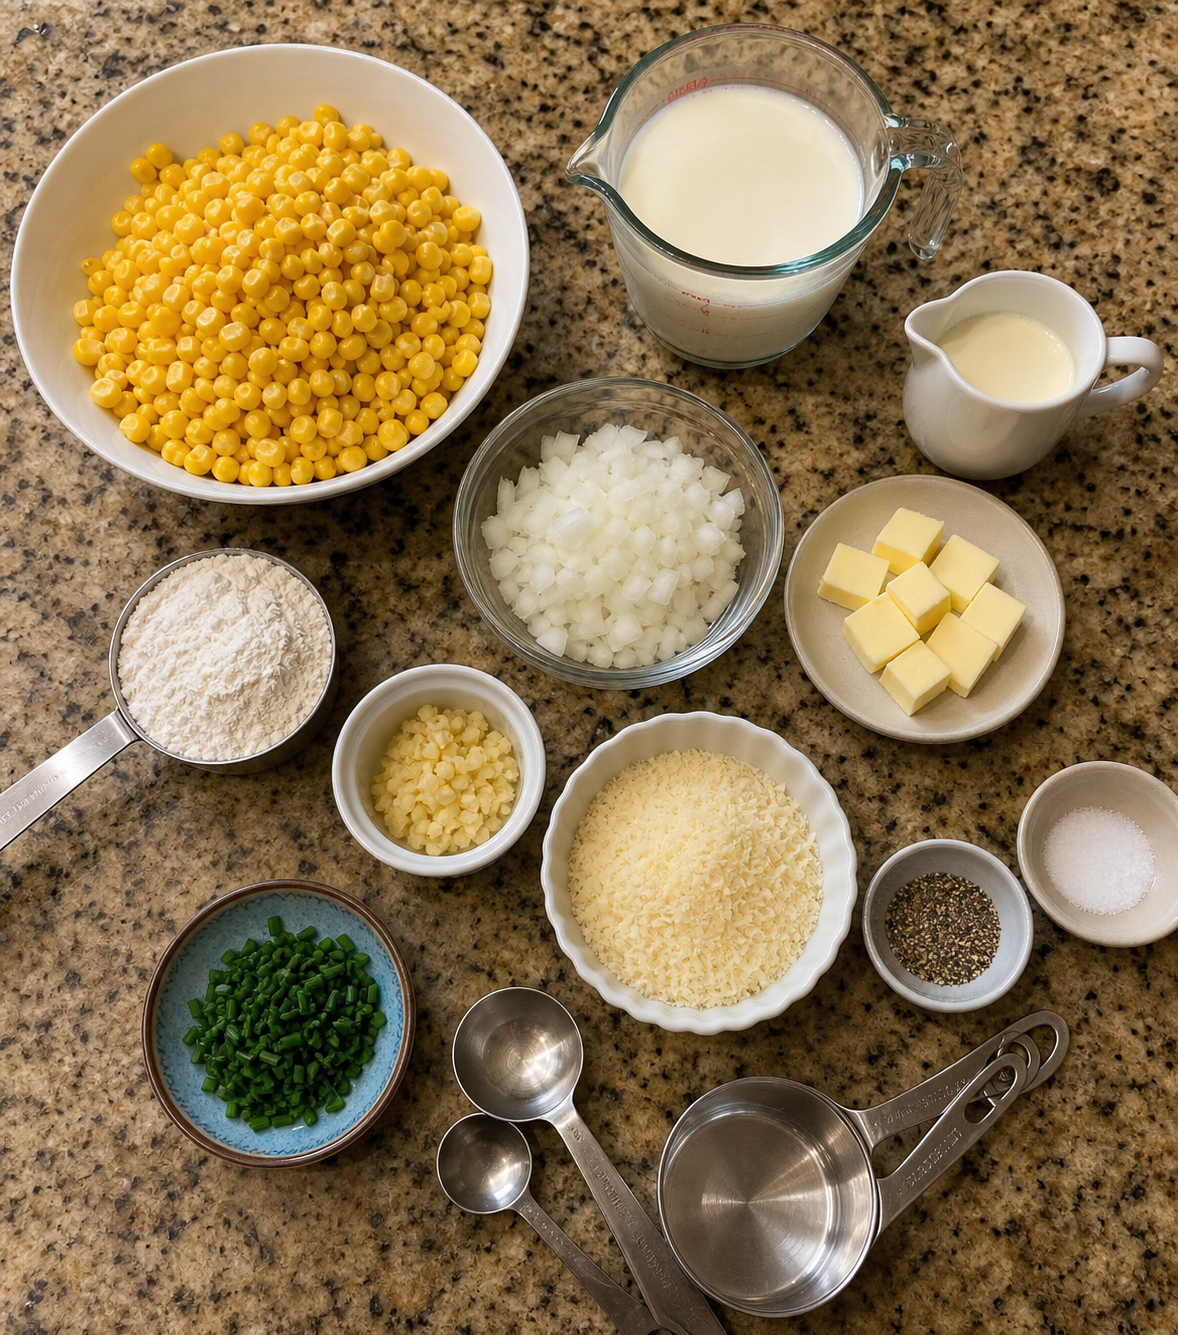
The ingredient list is intentionally simple. For the fastest version, reach for well-drained canned corn. If you are using frozen corn, add it straight from the freezer and give it a few extra minutes to heat through and release moisture. If it is corn season, cut the kernels from fresh ears and scrape the cobs with the back of your knife to capture some of that milky corn liquid.
Heavy cream gives this side dish its comforting richness, while whole milk keeps it from feeling too heavy. You can use half-and-half in place of both if that is what you have, though the sauce may be a touch lighter. The onion is technically optional, but I recommend it if you can spare a few minutes. Finely diced onion melts down into the butter and makes the whole skillet taste more complete.
How to Make It
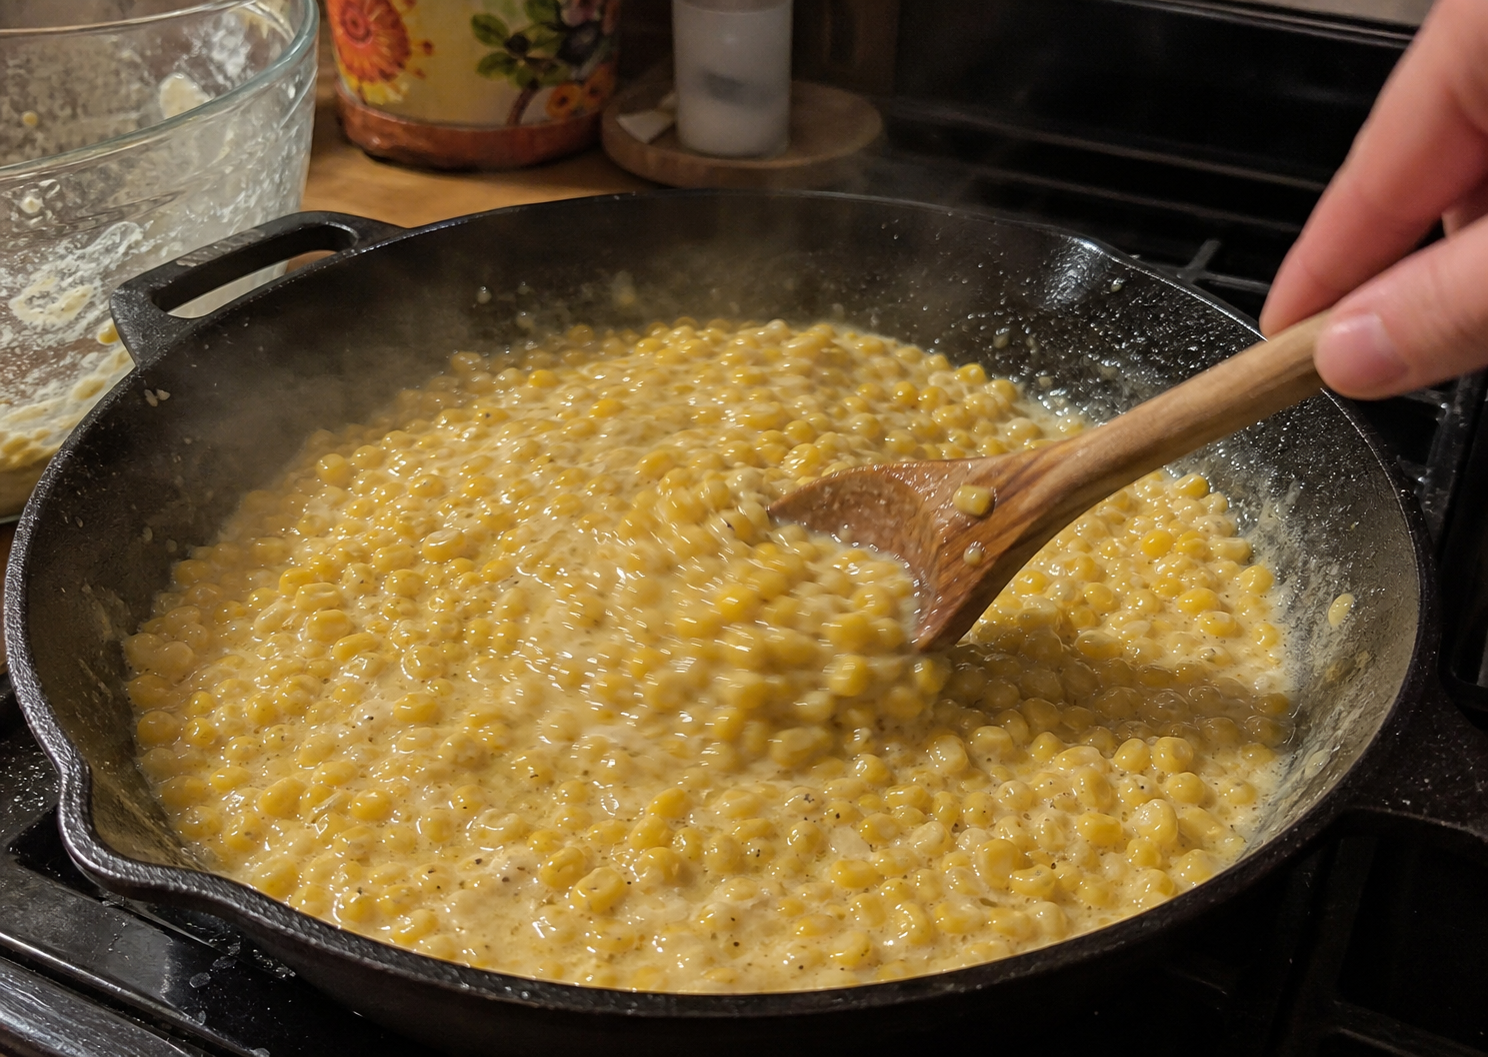
Start by heating a 10-inch cast iron skillet over medium heat. Add the butter and let it melt, then stir in the diced onion. Cook it just until softened, not deeply browned. Add the garlic and stir for about 30 seconds, because garlic can go from fragrant to bitter quickly in cast iron.
Next, add the corn. Spread it out in the skillet and let it cook for several minutes, stirring now and then. You are looking for the corn to get hot and for a little moisture to cook away. If you see a few golden spots on the kernels, that is a good thing. Those little browned bits are exactly why this recipe belongs in a skillet.
Sprinkle the flour over the corn and stir until it disappears into the butter. Then slowly pour in the milk and cream while stirring. The sauce will look loose at first, but after a few minutes of gentle simmering it will thicken into a silky coating. Season with salt, pepper, sugar if using, and a small pinch of smoked paprika or cayenne if you like a little background warmth.
Finish with Parmesan if you want a savory, slightly nutty edge. It is optional, but delicious. Let the creamed corn sit for a minute or two off the heat before serving. The sauce thickens slightly as it rests, and the cast iron keeps it warm at the table.

Serving Ideas
This is one of those flexible sides that plays nicely with almost anything hearty. For weeknights, I like it with cast iron pork chops, skillet chicken thighs, meatloaf, or pan-seared steak. It also works with barbecue-style meals like sausages, ribs, pulled pork sandwiches, or burgers.
For holidays, this skillet creamed corn is a low-stress win. It brings the sweet, creamy comfort people expect from a holiday side, but it stays on the stovetop and frees up oven space. If you want to dress it up, sprinkle sliced green onions, chives, crumbled bacon, or a little extra Parmesan over the top right before serving.
Tips for the Best Creamed Corn
- Drain canned corn very well: Extra liquid will thin the sauce and make the dish less rich.
- Do not rush the corn: A few minutes in the skillet before adding liquid gives better flavor and texture.
- Keep the heat moderate: Cast iron holds heat well, so medium heat is plenty for softening onion and simmering the sauce.
- Adjust the thickness: If it gets too thick, splash in more milk. If it is too loose, simmer a few more minutes.
- Taste at the end: Corn varies in sweetness, so the final pinch of salt, pepper, or sugar makes a difference.
Storage and Reheating
Leftover creamed corn keeps well in an airtight container in the refrigerator for up to 3 days. The sauce thickens as it chills, so reheat it gently on the stovetop or in the microwave with a splash of milk stirred in. Warm it slowly and stir often so the creamy sauce comes back together.
I do not usually freeze creamed corn because dairy sauces can separate after thawing. If you do freeze it, expect the texture to be less silky and plan to reheat it gently with a little extra milk or cream.